Showing posts with label recycled materials. Show all posts

March 4, 2013

Scrapbooking Demo- easy double page spread

   In high school, I was forced to scrap book as part of a team bonding for, of all things, volleyball. It was something I dreaded doing as I have never been much of a girly girl (as I wrongfully assumed all scrapbookers must be.)

finished scrapbook 2-page spread
     However, once I actually started scrapbooking, I realized it was something I could really get into. After all, I love stickers, bright colors, and organizing information. I did two more forced scrapbooks during high school and a couple of scrapbooky things during college, but didn't have time for more than that.

     Now that I have left college however, I find myself with all sorts of paper junk that I collected over the four years I was there. I sorted it all by year, month, then event and began the process of making scrapbooks for each year I was in college. I finished my freshman year and thought I would share my process for making a scrapbooked double page spread, my way (aka re-purposing leftover pieces of paper and having a unified color theme to create a cohesive look and feel to the pages).

January 13, 2013

A-Door-Aborable Wreath: Tech Edition, Part 2

    Hello again! Just wanted to give the second half of the LED jingle bells wreath project. The first half of the project covered the creation of the wreath itself, using cardboard, a craft knife, glue, and a few other materials. The video is the conclusion of the second part of the wreath project: adding song and lights!


    Though I liked the wreath when I first made it, it is much more interesting now that my brother incorporated LED lights and an arduino code to make it play "Jingle Bells." To get the code he wrote as well as some read through instructions on how to get started, click here. Some basic info on the project, in his words:

"To make a similar project, on your breadboard, wire two LEDs in series on each Arduino out pin called in the "LED PIN" array, and include a 330 Ohm resistor on each pin circuit to ensure that you stay under the maximum current draw for each pin.  The piezobuzzer is wired as usual, and the pushbutton has a pull up resistor to prevent any erroneous 'low' signals. "

January 4, 2013

A-Door-Aborable Wreath: Tech Edition, Part 1

      I know it has been a while since I've written a post (the combination of being in my best friend's wedding and the holidays), but I have another - perhaps now less timely- Christmas wreath project. This project is unique in that my brother and I collaborated on the design and implementation of the wreath. I also knew that I wanted to use cardboard in some way because I have a bunch of it at my house from work and it is a cheap material to work with. This post will just describe making the cardboard wreath. The next post will cover how to install LED lights and set up the arduino code to play Christmas music.

Materials:
  •  cardboard, lots of cardboard
  • wood or white glue (Elmer's or other brand)
  • An exacto knife or a box cutter
  • marker or pen
  • surface to cut on (one that you don't mind getting scratched up or marked on)
  • (optional) acrylic paint (red, green, white)
How To:

1.  The basic plan was to create a wreath of interlocking triangles. So, the first step was to cut out a bunch of similarly sized triangles in three different sizes. (I needed about 60-75 total for the project)
Triangles- so many to cut out. Get a cushy exacto knife or your hand is gonna kill you afterward

August 24, 2012

Measure Twice, Cut Once

    Ah yes, the age old adage: measure twice, cut once. Meaning that if you take proper time to figure out what you are going to do with a project before jumping in willy nilly, you (hopefully) won't have to do it over again.  But I have never been one to listen to tried and true wisdom and In dislike tedious calculations (I'd rather eyeball it- which made my decision not to pursue architecture fairly obvious.) So, instead I ended up having to do much more trouble shooting with these three projects than I would have if I had just measured and thought about what I was doing before I started sewing.
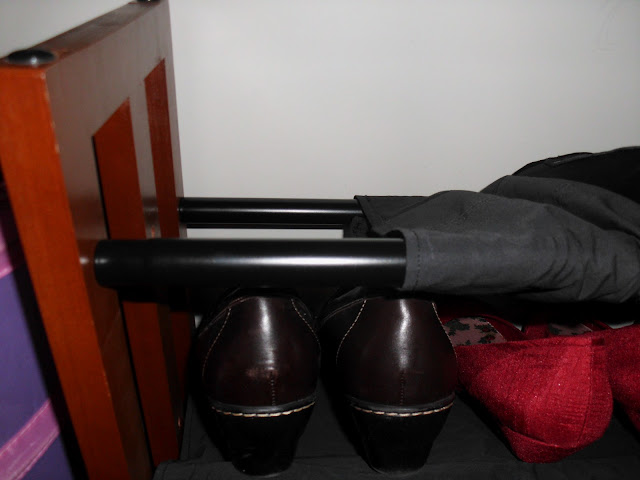
Finished product: 2 metal slats that make up the tiers, covered in a fabric sleeve to keep shoes from falling through

    I have lots of fun projects to tackle now that I am living in Houston, Texas. So, first things first: make sense of my shoes. My brother gave me a shoe rack with 3 tiers a while ago, however, whenever I used it, my shoes would always fall through. Basically, it is missing the middle metal rung on each tier (no idea what happened to them...) When I moved, it got taken apart and it was the perfect opportunity for me to fix the problem. My solution? Making sleeves out of fabric (I was thinking of wrapping paper at first, but I didn't go for that as I had more fabric and no wrapping paper). It probably would have worked fairly well with the paper, but fabric will stand the test of time for sure.
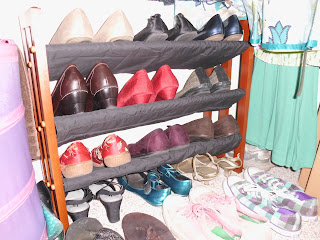
It looks classier with fabric sleeves
     This, of course, should have been an easy problem. You have a length/width of fabric and you measure around the bars. I could have wrapped a piece of string around this and measured. Easy right? But I didn't do it that way. Instead, I tried to use a length of fabric I had left over from a previous project, thinking that sewing the ends together I would have plenty of room. Not so much. However, I carried on, squeezing it over the rungs/tiers and making the next two sleeves. Unfortunately, when I went to screw in the second set of screws, I had a bit of a problem on my hands. The material was too tight on one end (yes, on all three of the pieces.)

     So I had to take it apart and sew on a scrap length of fabric to make it fit. Not my most stellar craft moment, for sure.  After that, they fit. Thank goodness.
 

June 15, 2012

Steampunk Jewelry, Part 2

  
My friend Courtney reminded me today that I haven't posted anything new here for almost a month. Mainly, this is because I haven't had any new crafts to post about because I have been working so hard on getting ready for my first show at Soonercon (a comic convention in Oklahoma). I was making pendants (refer back to my first post about this topic) and my life exploded steampunk.


     Everyone in my family kind of jumped on board, from helping me take apart watches to coming up with new things to make steampunk-esque. My grandfather had a huge collection of keys, including some awesome skeleton keys, so those began to feature prominently in my work.

     Today was the first day of the convention and it was an interesting experience (shout out to: the guy who bought my very first piece; the girl who picked out my mother's favorite; and the little girl who loved the shiny, bling-ed out keys- thanks!) I will be putting up a page devoted to my work, so check back later for more on that.


May 18, 2012

Garden Tripods

   Yes, yes, yes. I will admit, I am on a bit of a gardening craft kick right now. I'm sure it will end soon, with the full heat of an Oklahoma summer looming. Blech. 100+ degree weather is not the best environment for plants.

    Which means I must get it out all now, right? This week, I made an easy garden tripod with just 3 simple materials (plus a pair of scissors)! Awesome, right? But I can't take any of the credit. I actually found great instructions to the project online, here. Anyway, it was a snap to put together these bamboo poles. The only adjustment I made was cutting down the bamboo to fit the needs of a small climbing vine rather than using an entire length of bamboo for each leg. This also allowed me to be able to make more support structures for the vines. So let's grab some leftover bamboo and get climbing.

April 18, 2012

Garden Name Sticks

Finished product
      After the doozy of last post, I wanted to keep it nice and brief. However, I'm still in the garden mood. I got an idea for this project when I couldn't find any metal dowels to use and after I tried banging on a metal spoon to make it flat (it worked much better in my head). When I failed at both of those options, I began rooting around in the wooden skewers and found some unused (and washed, but used) chopsticks. At first, I was just going to color coordinate them - because I'm organized like that- but I figured it would actually be better if you could see what the plant was.

      I need to make a ton more of these for all the various plants we are growing this year (onions, carrots, peas, blueberries, blackberries, squash, zucchini, lettuce, mustard greens, and tomatoes, plus a few others)! Especially since they are so easy. But to start, I focused on the herbs for my new garden center on wheels.

Materials:
  • chopsticks, unfinished wood
  • permanent markers        (I used sharpies)
  • A fine tip black permanent marker
Chopsticks
Sharpies


April 10, 2012

Gardening...on Wheels?

Finished project!
    Well, spring is here and being able to go outside again is both good and bad for my creative side. It means I spend less time indoors with idle time on my hands, but it also means more time spent in outdoor spaces. And since the backyard becomes an extension of our home in spring, what better craft project to do than one involving plants and our patio.

   Last summer, I found a few old drawers at an estate sale. The lady sold them to me and asked what I planned on doing with them. I said I wanted to make a planter out of them - of course, right? Now that was all well and good to say it, but actually getting there was kind of a struggle. First, I had to clean them out (they had sat outside all fall and winter) and put holes in them for drainage. Then I painted the decorative details purple and water proofed them using spar varnish. Next came the question of how to actually arrange them. My dad and I went through quite a number of configurations before settling on the final design. And then I was so happy, thinking all we had to do was put it together and we'd be done. But then my mom got in on the design process, suggesting we add height and wheels.

     Wheels? What? Why? But still, I was intrigued by the idea of a cart peddling herbs. So, we added old chair pieces and AV cart wheels my dad had lying around. And Tada! We were done, right? No, now we must paint the chair legs white so that they match the drawers. This is an example of a little input from others being a good idea, but too much having the potential to derail a project. My garden clock is ticking away, letting me know that time is running out for my herbs to be able to grow and flourish as the heated onslaught of summer peaks it head over the horizon, laughing that we are at a standstill.

March 7, 2012

Steampunk Jewelry

A sample of the pieces, right before they are baked
    As promised, I have a new craft for you, based on a steampunk aesthetic. Basically, this is a brass/metallic look including gears, sprockets, wires, etc. Steampunk is based upon an alternate version of reality; an idea of how our world would have developed differently if Victorian England had relied more heavily on steam power rather than developing electricity. There are tons of sources out there to describe how this look came about, so check some of that out for a better explanation. 
My craft zone for steampunk jewelry projects. You can see clay, embossing powder, as well as tools (in the soup can)
     My mom keeps checking out books on this aesthetic used in crafting and one of my really good friends recently went to a steampunk/scifi convention in Dallas that really got me into the idea. Especially when it comes to costuming and jewelry, I love make-believe and whimsy. This craft lends itself well to the beginner. Gathering all the little tidbits is probably the hardest part of the whole creative process. Luckily for me, I am a compulsive craft/object hoarder, so I often have lots of junk lying around dying to be played with and put in a project.

February 17, 2012

Baby Tees

The happy recipient
     So in my last blog, I wrote about wanting to combine silk screening with my slice die-cut machine. I found the perfect project in making baby clothes. This is something my mom has wanted me to do ever since I got the Yudu silk screening machine (to be honest, I think that is the real reason I got it.) But anyway, baby clothing is always so adorable and the pieces we love the most are always hand printed or hand sewn little jewels in a wardrobe.

    Since I was bringing over some of my weapon pillows for my cousins, I figured the newest addition to our family should also get a little something uniquely made. Why not a baby romper....with a throwing star or with my dad's face on it. A perfect baby gift, right? Ok, I thought so, my mother wasn't so sure. But honestly, she should be happy I put her idea (with a few tweaks) to actual use.  : )  Just don't throw the baby.

November 29, 2011

Vintage Goggles, meet Steampunk


                                     Steampunked!

 I got these vintage WWII era goggles at a flea market a couple of years ago. I thought that they looked really neat with the green glass inside the frames. Unfortunately, they were a little ravaged by time and most of the fabric on the sides was ripped off. That was a total bummer, but I figured I could always repair them if I needed. Then, I kind of forgot about them, thinking they made a cool vignette on my shelves.
    Recently though, my friend told me she needed a costume for a steam punk convention that her boyfriend wanted to go to around New Year's time. This gave me the incentive to take another look at the goggles, to see if I actually could repair them. After toying with them for a little while, I realized I wasn't going to save any of the fabric because it was literally falling apart in my fingers. I unscrewed the frames from the goggles and stripped all the fabric off of the wire and started fresh.

November 2, 2011

Halloween Project, Doggie Dino

The classy dino pup waiting for trick-or-treaters at the door

Ok, I saw this idea in Martha Stewart living and couldn't resist trying it myself. Though I don't have a dog, one of my friends said I could dress her dog up for Halloween. Wooohooo! My cat never lets me dress her up any more, so this is a great new avenue for me.

Here is the link as well as some instructions for how Martha did her tank: http://www.marthastewart.com/852544/doggie-dino-tank?czone=holiday/halloween-center/halloween-center-costumes 


However, I did things a bit differently based on what I had available. So....

Supplies:
Inside, with all spines inserted
  • tank (my friend's dog is medium size and turns out she fit about a child's small t-shirt)
  • foam sheets (mine was green, but I think black might have looked even better)
  • sewing machine (optional)

October 22, 2011

Halloween Recycling Projects

The finished product
 SPOOKY SPIDER, front yard decoration

 Halloween is my dad's favorite holiday and we love to go all out in the yard making a spooky scene. Usually there is at least one or two kids that refuse to walk to our door because they are scared of what is in our yard. While the classic graves have shown up in our front garden many a time, this year, dad and I tried to go for something new.

 Supplies
(really, you can use whatever you have lying around - that's what we did- but, here is what we used to achieve the final look): 
Supplies!

Stuffing
  • 2 black tarps (one to wrap, one to cut and cover the "hairy" legs)
  • PVC pipe, cut so the legs are "akimbo"
  • trashcan
  • ice chest, styrofoam
  • egg crate mattress
  • lawn chair cushion
  • wicker lawn chair
  • wood stump
  • heat lamp w/ red light bulb
 Securing
  • bungee cord
  • rope 
  • cord
  • watering hose

September 26, 2011

Hair Clips

Materials:

  • ribbon (1/8"-1/2") any color
  • stickers, glitter, fridge magnets, comics, or any other decorations you want
  • bottle caps (if you don't want the brand to show through, spray paint them a fun color first)
  • hot glue gun + glue sticks
  • blank hair clips or pins (you can get these at a craft store)
  • (optional) cardboard cut out in the same shape/size as the bottle caps - these are used to make the inside of your bottle caps less deep inside before you add decorations. 

September 8, 2011

Glass Towers

Instructions:

  1. Find lots of sturdy, 1" or thicker, glasses
  2. Get a heavy duty, clear drying epoxy glue
  3. Lay down an old quilt or towel or tarp 
  4. Lay out the pieces in a pleasing shaped tower (from a sturdy base to a smaller top seemed to work best, at least in our experience), but horizontally so none of them break
  5. Assemble two pieces at a time, using heavy duty glue (blech, we had one that smelled like asphalt)
  6. Hold pieces together (if using fast drying glue); OR tape/tie/clamp pieces together gently until glue dries all the way
  7. Keep assembling with glue until tower is complete and let dry completely before placing outside

September 3, 2011

Another Bracelet Project

Behind the Seams:
My sketch of what Kayla wanted
      Last time I saw my friend Kayla, I promised her a bracelet like I made for Kelcie (check it out on the sewing projects page) for her birthday. Though her birthday was in May, I decided it was about time she got a present. :) Better late than never, right?
   
Reversible Bracelet, "inside" shown
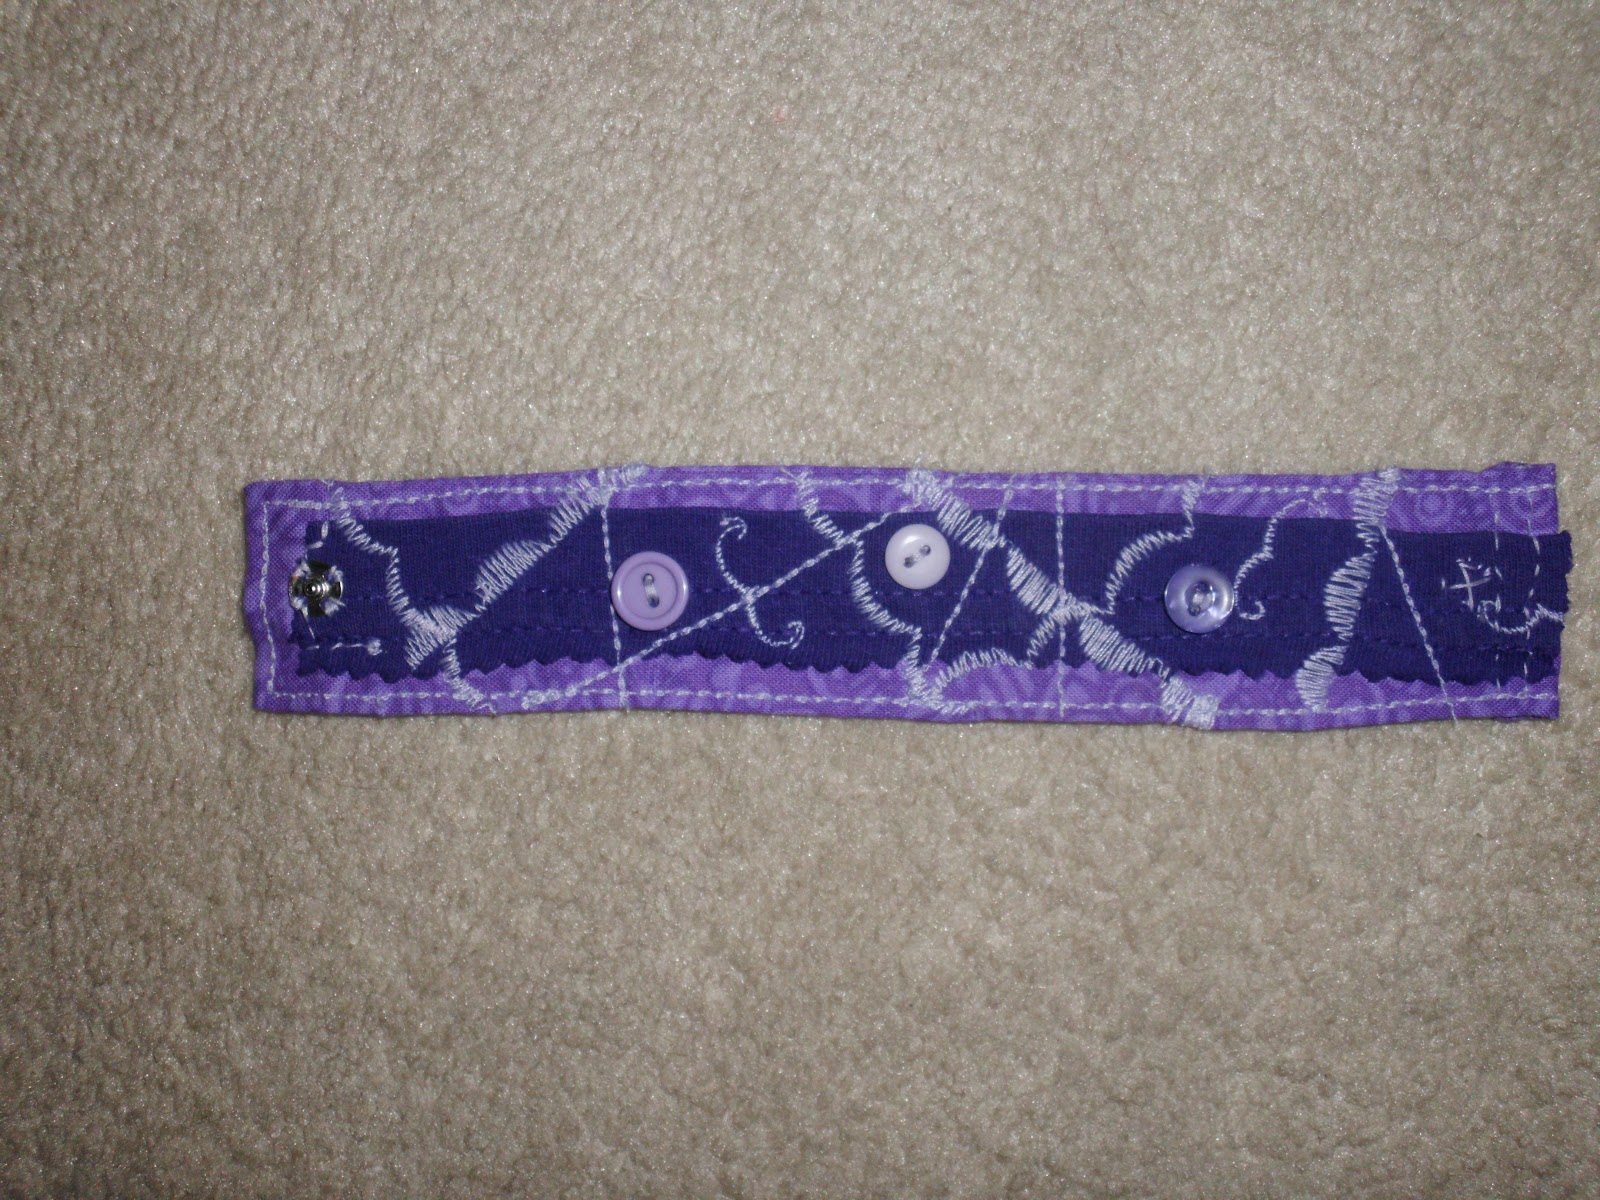
       Anyway, we discussed what she wanted (length, color, snap or button, etc.) and I had it written down. It's been another while and I remembered I would see her for our first Project Runway viewing party at my house, so I finally got down to business and worked on it. She said she wanted an entirely monochromatic bracelet and realized she had no jewelry in purple yet, so that's the color we decided. Luckily, purple is one of my mother's favorite colors and I have been cutting up lots of t-shirts for other projects, so we have lots of purple scraps to work with at my house.


Materials: 

  • 1 scrap of fabric, roughly 7 inches long and 2 inches wide
  • 1 scrap of fabric, roughly 6 inches long
  • Buttons, color/size your choice
  • Thread, color your choice
  • The "outside" of the bracelet
  • closure (either a snap or button)
How to:
  1. Take 7"piece and put wrong side together and sew around 1 long and 1 short edge, leaving one side open to turn right side out.
  2. Tuck in raw edges and then topstitch sew around entire rectangle (1/8" seam)
  3. Pin 6 inch fabric to middle of rectangle/cuff
  4. Sew in crazy patterns and directions until you have a pleasing effect, changing color threads if you want a multi-colored look
  5. Sew on buttons in places that are lacking thread or in areas you want as your main design
  6. Sew on the snap or other type of closure, fitting it to your wrist


     This is a nice, simple project that doesn't take very long to work on and the end result is very pleasing (my opinion, of course). You can use scraps and come up with a variety of looks, which is cool. In this bracelet, I used the hemline of a t-shirt for the dark middle purple mixed with a print I bought at Hancock Fabrics a long time ago. Depending on how you do the stitching and what color/type of buttons you use, you can really change the look of the bracelet.  Also, try adjusting the width of the cuff from skinny to fat!

August 29, 2011

Quilting Time

 Making a T-shirt Quilt (in steps):
  1. Cut out t-shirts using a cardboard rectangle as a pattern (mine was 13" X 17")
  2. Line back of each t-shirt rectangle with interfacing
  3. Lay out pattern you want for quilt out of t-shirt rectangles (I had enough for a oversize queen)
  4. Pin together columns of t-shirt rectangles and sew (1/2 -1" seam allowance)
  5. Pin together columns and sew to create your quilt top
  6. Find a piece of fabric large enough to cover back of quilt or made quilt double-sided
  7. Putting right sides of quilt and back fabric together, place batting on top of quilt side
  8. Sew around entire piece leaving 2 1/2 feet opening at bottom of quilt
  9. Turn quilt right side out, using hold at bottom of quilt
  10. Pin and topstitch around entire quilt (I used a 1/4" seam allowance)
  11. Sew across top and sides of each t-shirt rectangle to finish OR outline each design on t-shirt rectangle OR both OR tie each corned or t-shirt rectangle in place using yarn, etc. (It is really up to you how you want to finish it as each way will yield a different look.)
  12. Put on a bed and showcase your t-shirt memories!