August 29, 2012

Curtain Drama, Part 2

Hello again,

Measurements (1.5 X length; add 6" to height)
     I just finished the curtains for my room. This project was full of decisions, starting with whether or not I wanted to buy commercially made curtains or make my own. The window in my new bedroom is rather large (74"x 60"), which means usually means expensive. An added challenge was the amount of light being let through at all times- my room was as almost as bright during the day as at night- which was the whole reason I thought of doing curtains. I needed to make sure I got black out material to solve this problem.

    After looking at multiple stores to curtains, I decided to make my own. All the ones I saw were either too childish (bright colors, sheer, glitter) or too grown up (boring colors, muted tones). I really needed something in between, so onward and upward to the fabric store. I went to Jo-Ann's, and though I will be the first to admit they aren't my favorite craft store, they did have a home decor section with blackout curtain material. The Hobby Lobby across the street did not (...I miss you hancock fabric).
Blackout fabric: middle seam   Make sure so sew both sides of the seam (1/8") so that one side doesn't flap open


August 27, 2012

Curtain Drama, Part 1

     I desperately need curtains in my bedroom. After being attacked by something (eww, creepy bugs that bit my face) on our family reunion in upstate NY, I threw out my face sleeping mask. When I moved to Houston, I realized how much light came into my room at night, but couldn't bring myself to buy another mask just in case it happened again (eww, creepy bugs that bit my face). Curtains were the answer!
     The story of how I finally got my curtains will be in the next part post. This is the story of how I made my curtain rod. After wandering around Home Depot for almost 2 hours, I was emotionally exhausted. Who knew putting up curtains and a shelf in my closet would be so draining? All the curtain rods for a window my size were ridiculously expensive ($27-$32) and I would still have to buy curtains to put on these rods. The tension rods, while cheaper, wouldn't be able to hold up the amount/weight of fabric that my curtains were sure to have being blackout style. 
Curtain Rod assembly, once complete: Closet rod + U conduit clamp + screws + end caps + spraypaint

August 24, 2012

Measure Twice, Cut Once

    Ah yes, the age old adage: measure twice, cut once. Meaning that if you take proper time to figure out what you are going to do with a project before jumping in willy nilly, you (hopefully) won't have to do it over again.  But I have never been one to listen to tried and true wisdom and In dislike tedious calculations (I'd rather eyeball it- which made my decision not to pursue architecture fairly obvious.) So, instead I ended up having to do much more trouble shooting with these three projects than I would have if I had just measured and thought about what I was doing before I started sewing.
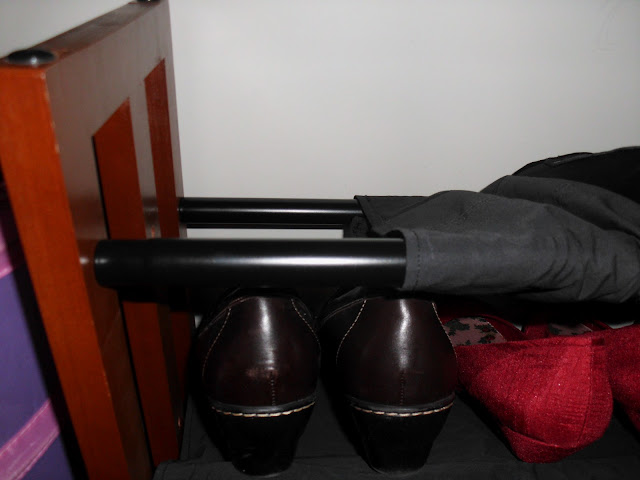
Finished product: 2 metal slats that make up the tiers, covered in a fabric sleeve to keep shoes from falling through

    I have lots of fun projects to tackle now that I am living in Houston, Texas. So, first things first: make sense of my shoes. My brother gave me a shoe rack with 3 tiers a while ago, however, whenever I used it, my shoes would always fall through. Basically, it is missing the middle metal rung on each tier (no idea what happened to them...) When I moved, it got taken apart and it was the perfect opportunity for me to fix the problem. My solution? Making sleeves out of fabric (I was thinking of wrapping paper at first, but I didn't go for that as I had more fabric and no wrapping paper). It probably would have worked fairly well with the paper, but fabric will stand the test of time for sure.
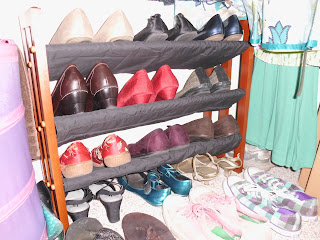
It looks classier with fabric sleeves
     This, of course, should have been an easy problem. You have a length/width of fabric and you measure around the bars. I could have wrapped a piece of string around this and measured. Easy right? But I didn't do it that way. Instead, I tried to use a length of fabric I had left over from a previous project, thinking that sewing the ends together I would have plenty of room. Not so much. However, I carried on, squeezing it over the rungs/tiers and making the next two sleeves. Unfortunately, when I went to screw in the second set of screws, I had a bit of a problem on my hands. The material was too tight on one end (yes, on all three of the pieces.)

     So I had to take it apart and sew on a scrap length of fabric to make it fit. Not my most stellar craft moment, for sure.  After that, they fit. Thank goodness.
 

August 5, 2012

Avacado Ice Cream?

     Ok, when I saw this recipe on Alton Brown's website and had to try it. After all, I absolutely love avacados- a well made guac is where it's at, but avacados are at their finest plain with just a bit of salt.  The texture thing can be a big issue for some people, but it doesn't bother me at all. And they have a good amount of fat (one day it's "good" and the next its back on the "no no" list), which makes them a perfect ingredient for ice cream.
     Yes, ice cream!
Getting ready to use my Kitchen Aid ice cream attachment; reading the instructions and assembling
   

July 10, 2012

A Blueberry Pake

   In the last month or so, I finally decided to move to Houston, TX (shout out to my brother Chris!) So I have been thoroughly busy deciding what to take instead of making anything new. However, I had the day off on the fourth of July and I wanted to bake! I wanted something "American" - and I had a lot of blueberries just waiting to go bad before I could eat them all- so I immediately thought of making blueberry pie. I mentioned this idea to my boyfriend, who said, "oh I hate pie, I like cake better" and that blueberry pie dream was killed. Of course, I never really love fruit pies myself and I know how much work they take (hello lattice crust: my worst nightmare), so I wasn't entirely mad at my BF for pointing his preference out.

But what else could I make?
Of course, of course! A Pake!

    If anyone else out there is addicted to Drop Dead Diva, they will immediately know what I am talking about since Stacy's Pakery has been in the plot-line for the show for a while now.  For all those others though, a pake is a pie recipe mixed with a cake recipe. If you search for "pake" on google, you will get a fully made pie inside of a cake (aka too much work). Instead, my pake has a pie crust and the bottom half is fruit filling; the top half is a sour cream cake. Goodbye need for a lattice top.

June 15, 2012

Steampunk Jewelry, Part 2

  
My friend Courtney reminded me today that I haven't posted anything new here for almost a month. Mainly, this is because I haven't had any new crafts to post about because I have been working so hard on getting ready for my first show at Soonercon (a comic convention in Oklahoma). I was making pendants (refer back to my first post about this topic) and my life exploded steampunk.


     Everyone in my family kind of jumped on board, from helping me take apart watches to coming up with new things to make steampunk-esque. My grandfather had a huge collection of keys, including some awesome skeleton keys, so those began to feature prominently in my work.

     Today was the first day of the convention and it was an interesting experience (shout out to: the guy who bought my very first piece; the girl who picked out my mother's favorite; and the little girl who loved the shiny, bling-ed out keys- thanks!) I will be putting up a page devoted to my work, so check back later for more on that.


May 22, 2012

Get Organized

      This is a project we've needed for quite some time: Cleaning up the workbench. Usually, it's such a mess that you really can't find anything you need in order for it to be productive. So over time, it gets used less and less because it isn't easily accessible and you can't ever find the tool you are looking for.  My dad is a bit of a tool hoarder (sorry dad, the truth had to come out sometime)- even if it is rusty or doesn't work well, it is kept just in case "it could be of use someday"
Just look at the amount of tape I used to make all these labels! (To the left of the storage bin)
     He already has one storage bin for small pokey things (nails, screws, molly bolts, washers, etc.), but he still had more, overflowing from recycled butter tub containers. And, they were all mixed together, which just killed my OCD side. So when I saw another clear plastic storage bin at a garage sale, I jumped on it like there was no tomorrow. I gave it to him for Christmas- he wasn't as humored as I was. He put it in the garage, on top of the workbench on its side and eventually piled stuff on top of it rather than actually using it. I hinted that perhaps we should clean the workbench after the drawer planter project, but he was decidedly ignoring my pleas.

    Of course, I couldn't just leave it like that! So I busted out my favorite tool, the label maker, and went to work. We still have 50x the amount of tools we need, but on the special occasion that I am looking for a brayer, a cordless drill, and a level, I have 3 of each to pick from, which makes me happy.