 |
| finished scrapbook 2-page spread |
Now that I have left college however, I find myself with all sorts of paper junk that I collected over the four years I was there. I sorted it all by year, month, then event and began the process of making scrapbooks for each year I was in college. I finished my freshman year and thought I would share my process for making a scrapbooked double page spread, my way (aka re-purposing leftover pieces of paper and having a unified color theme to create a cohesive look and feel to the pages).
Materials:
- two 12x12 sheets paper, contrasting colors
- as many stickers/frames/geegaws as possible that fit within color scheme and/or theme
- any original mementos as possible (tickets, fliers, newspaper articles, etc.)
- pictures (2-3 per page)
- scissors
- double sided tape or strong glue stick
- paper cutter
How To:
1. Get two pieces of corresponding paper (I chose turquoise and red because both were predominate colors in the pictures for this page). Arrange pictures into two pages, evenly spreading pictures to each page (I also tried to have one action shot and one artwork per page for balance.)
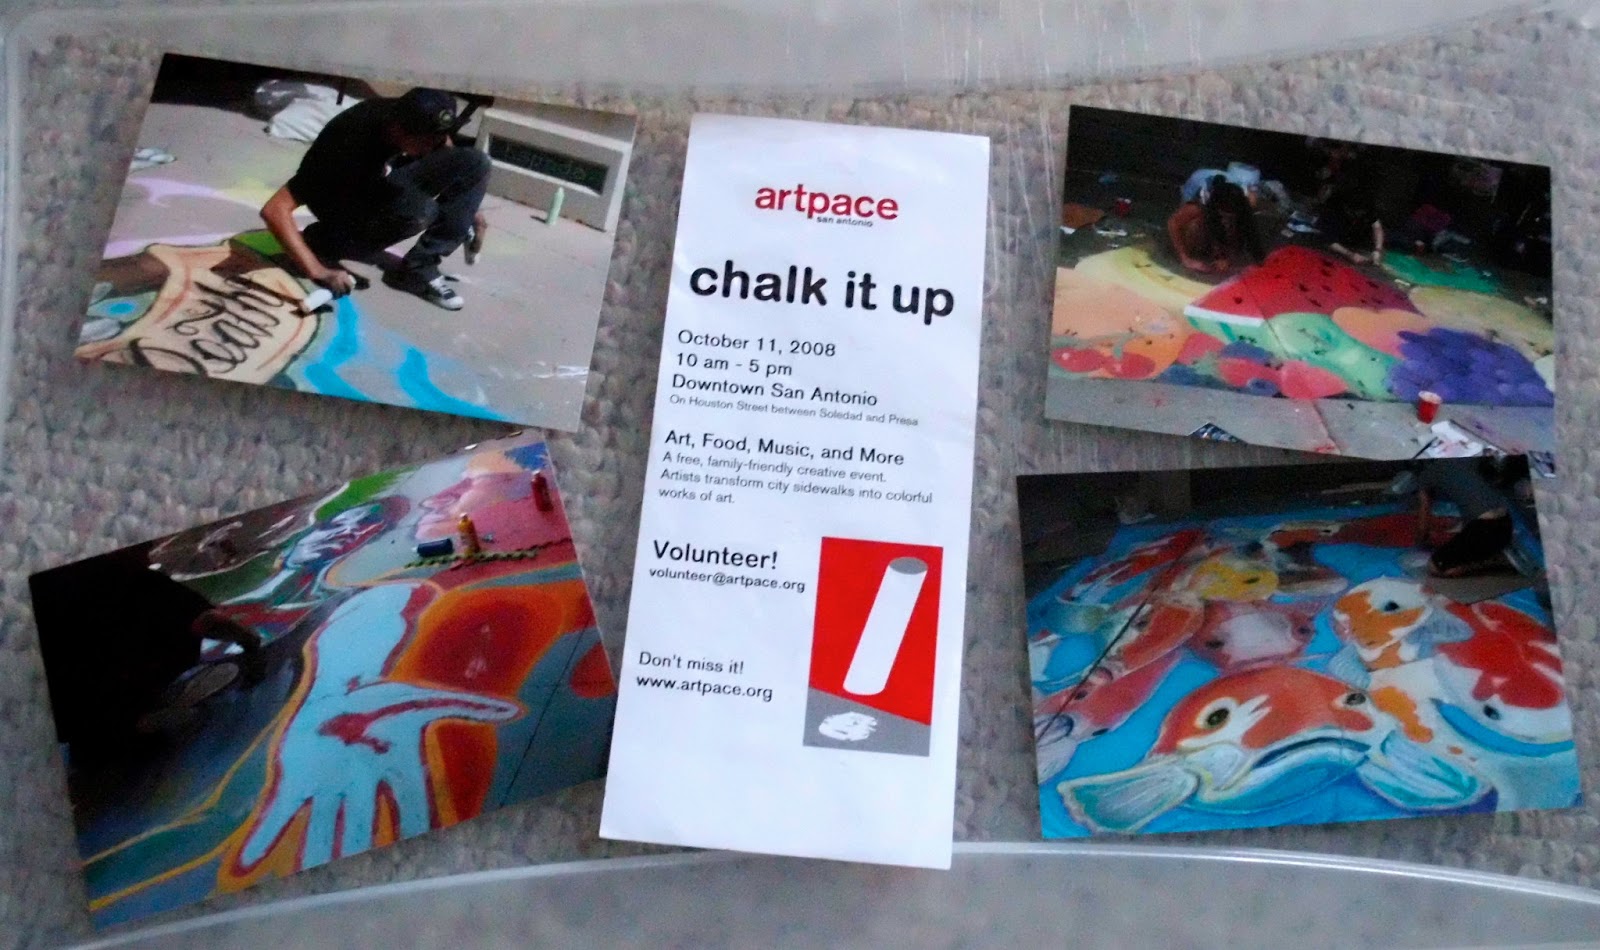 |
| 1st page is left half of pictures and 2nd page is right half of pictures; flier will be split in half between pages |
2. Follow the steps below to get two 8.5x11" pages, each with a strip of contrasting color at the bottom as a runner to further distinguish that this is the same event.
(I have also used this trick with larger piece of paper running vertically down the page)
 |
| Also, play with slight angles for your element; it makes for more interesting scrapbook composition |
3. Once you have the background complete, you can work on layering pictures and mementos with stickers and other fun things. Once which pictures and mementos go on each page is set, I I like to lay out all the stickers, frames, pictures, and other things all on top of what I am working on to see what all I have.
 |
| Underneath all the junk, you can see I have a cropped picture on each page, at an opposite corners from the other page and one normal sized photo; I did this for balance and to get more room for stickers and other stuff. |
5. Once you have the final layout, glue or tape down all the elements, one at a time, starting with the bottom layered items first (in this case, pictures.)
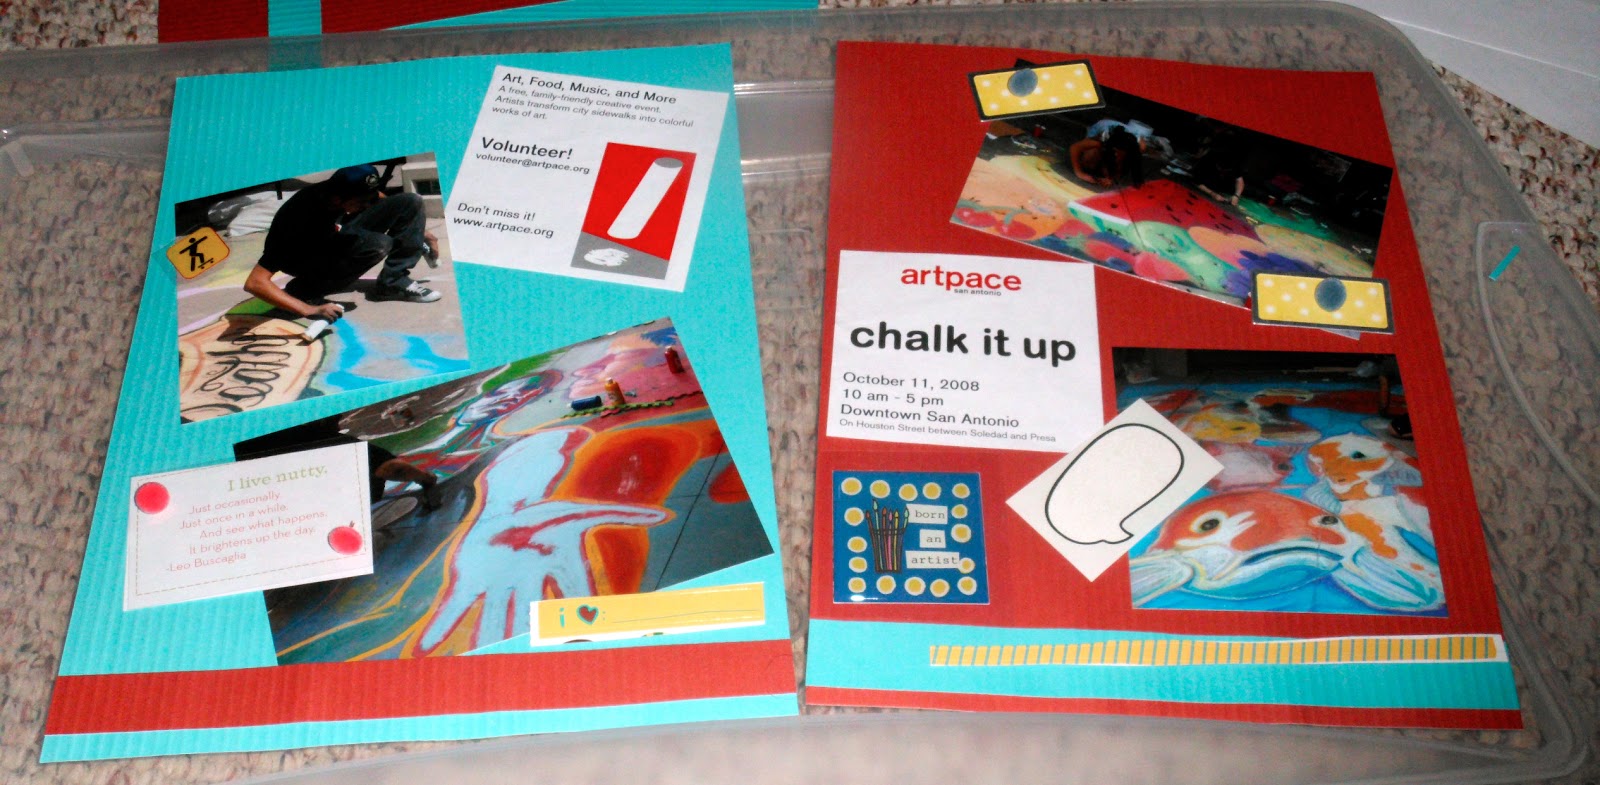
6. I still like to have at least a little bit of the background pages showing (after all, you paid $0.25-$1 on pretty papers- they should show), but if it still looks a little plain, you can add a title and more info about the event with color corresponding stickers.

Hope this demo helped those of you wanting to get into scrapbooking; you don't have to make it super fussy or buy tons of scrapbooking elements to make a page (though I will admit I have a huge collection of stickers now, though I try to only buy them on sale; same goes with paper). These pages cost probably around $1.50 (or less) each to make.
Let me know what you think: If there are ways you like to design your own scrapbooking pages or you know other money saving techniques, I would love to hear them!
~Thanks for reading,
Kate
No comments:
Post a Comment