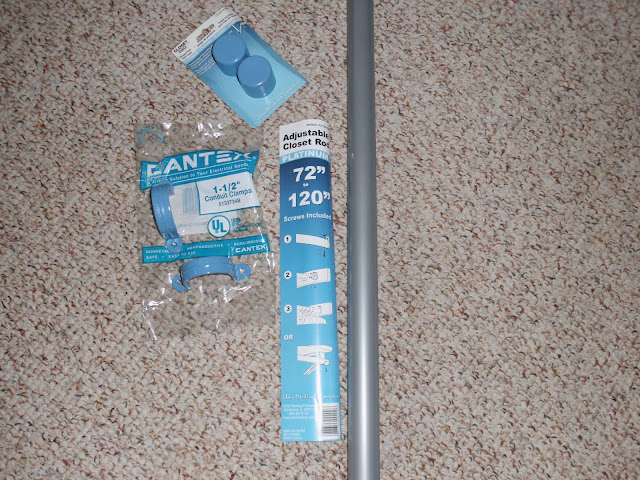
The story of how I finally got my curtains will be in the next part post. This is the story of how I made my curtain rod. After wandering around Home Depot for almost 2 hours, I was emotionally exhausted. Who knew putting up curtains and a shelf in my closet would be so draining? All the curtain rods for a window my size were ridiculously expensive ($27-$32) and I would still have to buy curtains to put on these rods. The tension rods, while cheaper, wouldn't be able to hold up the amount/weight of fabric that my curtains were sure to have being blackout style.
 |
| Curtain Rod assembly, once complete: Closet rod + U conduit clamp + screws + end caps + spraypaint |
So I wandered to the closet section and found a very nice extendable closet rod that fit would easily fit the dimensions of my window. All of the mounting hardware, though, didn't exactly fit my needs. After all, I was looking to mount it as a curtain rod, not put it in my closet. So I grabbed some end caps and headed back to the curtain section. After looking at the rather questionable mounting brackets sold individually, I asked one of the Home Depot associates if there were any other options for individual mounting posts, and her response was something like, "honey, what you see is what we got" (read: I'm trying to go on my break, leave me alone!)
 |
| Bracket and rod above my window |
However, as I am not one to take a straight route to a destination, I stopped down the next aisle as well (aisle 7) before making my way there. In that aisle, I found some nice PVC pipe accessories, including a U shaped piece with holes on either side of the ends (in a serif font). I still checked out aisle 10 just in case, but there weren't any hooks big enough to support my curtain project. The brackets and end caps were less than beautiful to look at, so I also grabbed a can of blue plastic spray paint while I was there.
 |
| U brackets, aka "conduit clamps" |
Got home and spray painted all the plastic pieces I would be using for the project. Then I used a stud finder to find the studs beside my window. Measured 5" directly out from the top of my window, and drilled a hole for my bottom screws. Next, I screwed in the bottom screw most of the way in, then made a mark inside the top hole for my next screw. Moved aside the bracket so it was out of the way and made the second set of holes. Lastly, I screwed in the second set of screws and my bracket was complete, ready for the curtain rod to be placed inside securely (for only ~$16!)
Materials:
 |
| Closet rod with spray painted end caps and U brackets |
* 1 Adjustable closet rod (72"-120")
* closet rod end caps
* a set of 1 1/2" conduit clamps
* (optional) plastic spray paint (mine was blue)
* 4 screws, at least 1" long* a stud finder
* a drill with correct size bits
* a screw driver
No comments:
Post a Comment